Embedded canvas apps - dynamic D365 context
Introduction
Embedded canvas apps are in public preview for a few weeks now and I've been quite disappointed because of the context that is passed to them. The context that is passed to canvas app is a static one and it doesn't display changes that are made on actual records so we need to use the data passed as context to make it dynamic in our app.
Canvas app control can be added to 2 elements on the form at the moment:
- Single Line of Text
- Subgrid
Single line of text control passes current record with all attributes as the context.
Subgrid control passes all records from the subgrid as context, but some fields are missing or just empty.
Problem
I wanted to create a canvas app that will allow us to edit contacts that are connected to the account directly from the account form.
Let's create an app on a single line of text control.
If you ask yourself why would we use a single line of text instead of subgrid which is the more intuitive way the answer is really simple, I still didn't find the way to do it on subgrid control because of the missing fields passed to the context (especially lookup ones). Hopefully, that issue will be fixed in near future.
Solution
First thing we need to input some test data into our D365 to validate our formulas in canvas app, othervise we will not be sure if the final result is ok.
I created 2 accounts with contacts that have email populated:
- Constoso (Account)
- John Doe (Contact)
- Jane Doe (Contact)
- Span (Account)
- Ivan Ficko (Contact)
Just like is shown on the image below.

Next step is opening a classic Account form editor because canvas app controls are not supported on the modern designer and open properties of the one single line of text field (Ticker Symbol field in this example).
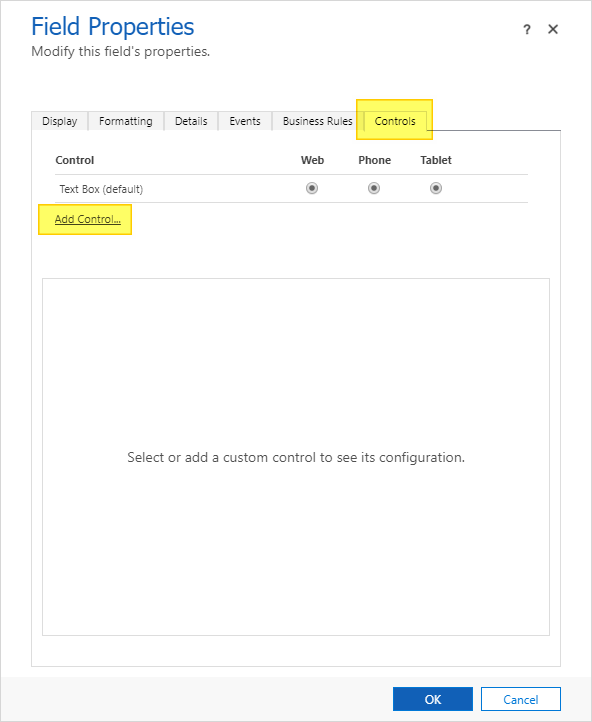
When field properties is opened click on the Controls tab and then Add control button.
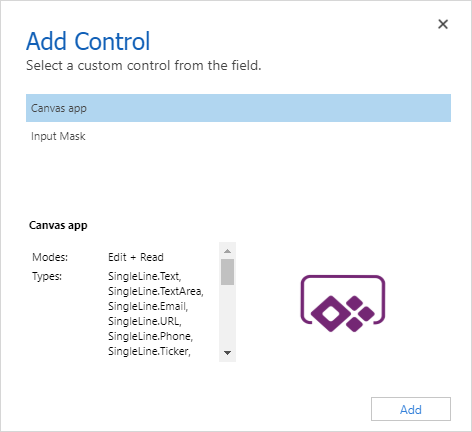
After that you should have Add control dialog opened and there you need to pick Canvas app option.
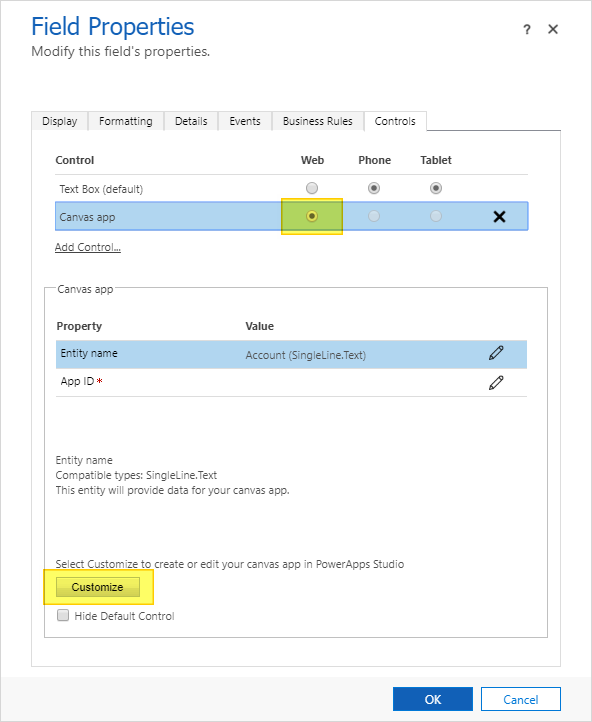
You will be redirected to the field properties dialog again. Few extra fields were added here, but you should leave them as is because everything will be set automatically. The only thing you need to change here is Web radio button from Text Box to Canvas App. All you need to do here is to click Customize button to open Canvas App designer.
This screen will popup when you enter the app designer and as you can see it looks like a blank template with Gallery control.

First thing we need to do here is to make our list dynamic because in main object ModelDrivenFormIntegration.Data we have just a static list.
Since we know that we will use Contacts in our Gallery we need to find out Account ID that will be passed to our Filter function to filter up contacts.
Account ID can be found by executing following function:
First(ModelDrivenFormIntegration.Data).AccountId
You need to know that ModelDrivenFormIntegration.Data object will always be a list so you need to search for the first element of the list.
Now when we know the ID of account we can start writing filter function on Items property of the Gallery control.
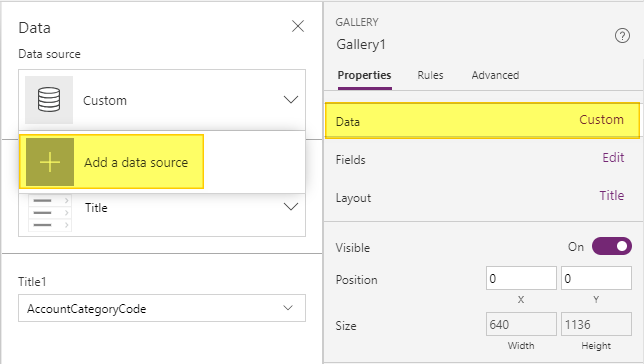
We need to change Data property of Gallery from Custom to Dynamics data source by clicking on Add a data source button.
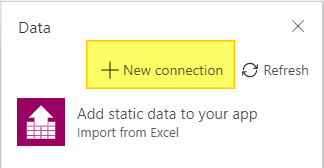
On the next screen click on the New connection button.
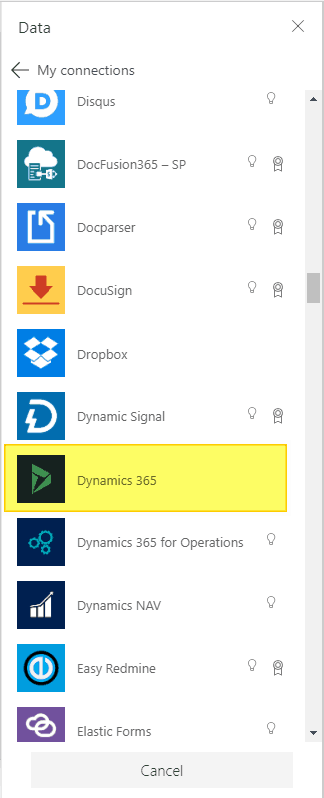
From the list choose Dynamics and click on the Create button.
Now you need to select which entity will be shown in the gallery control. Search for contacts and select Contacts checkbox and press Connect button.
If you done everything right you will see the list of all contacts in your gallery, but we need just contacts related to the account on our form.
Next step is to write a filter function in Items property of the gallery control.
Filter(Contacts, 'Company Name' = First(ModelDrivenFormIntegration.Data).AccountId)
This function filters all contacts by 'Company Name' field which is GUID of the account. Right side of equation is familiar from the previous step where we found a GUID of the account. After you type this function in the items field you should see the filtered contacts list.
Now we have the first part of the dynamics context done. It's time to do the edit form for our contacts.
Press the New screen button and add the new Form screen.
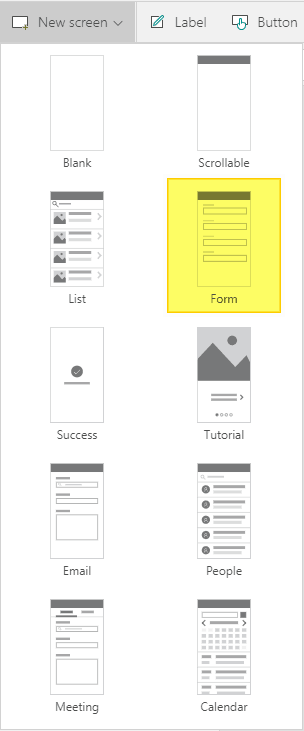
Again we need to set Data property to Dynamics data source and select Contacts entity. We don't need all the columns that are selected as default, so you can just uncheck them and include only first name, last name and email field.

Next, you need to set Item property to selected item from the gallery on the first screen. In my case, it's called Gallery1 and the property for the selected item is called Selected, so the final formula is shown below:
Gallery1.Selected
When you type that in Item property of EditForm control you should see details from the first contact on the list in your app.
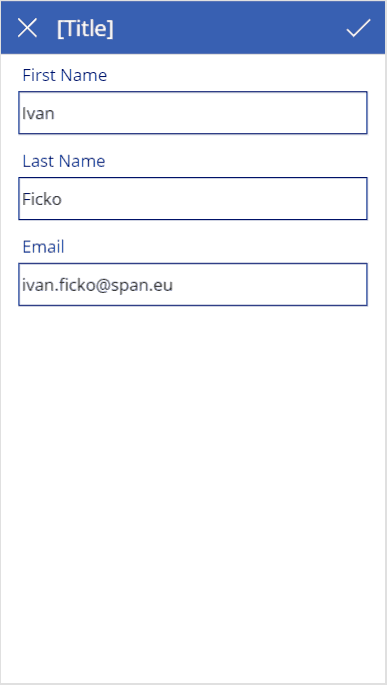
Every data link is now connected as it should be, but we still need to add some navigation controls.
First you need to edit next arrow on the list screen. You need to add one more action to OnSelect poperty and it's a easy one that will just open second screen. Formula in OnSelect poprety should look like one below:
Select(Parent);Navigate(Screen2,ScreenTransition.Fade)
Screen2 is the name of the second screen in my example and it can be different in your app. The second parameter is transition animation and you can choose any of those.
Final step is to add Navigation function on the second screen. Again change OnSelect property, but this time on accept button that looks like a white tick symbol in the upper right corner of the screen. Function here must look like:
SubmitForm(EditForm1);Navigate(Screen1,ScreenTransition.Fade)
The only thing you need to change here is to input name of the first screen.
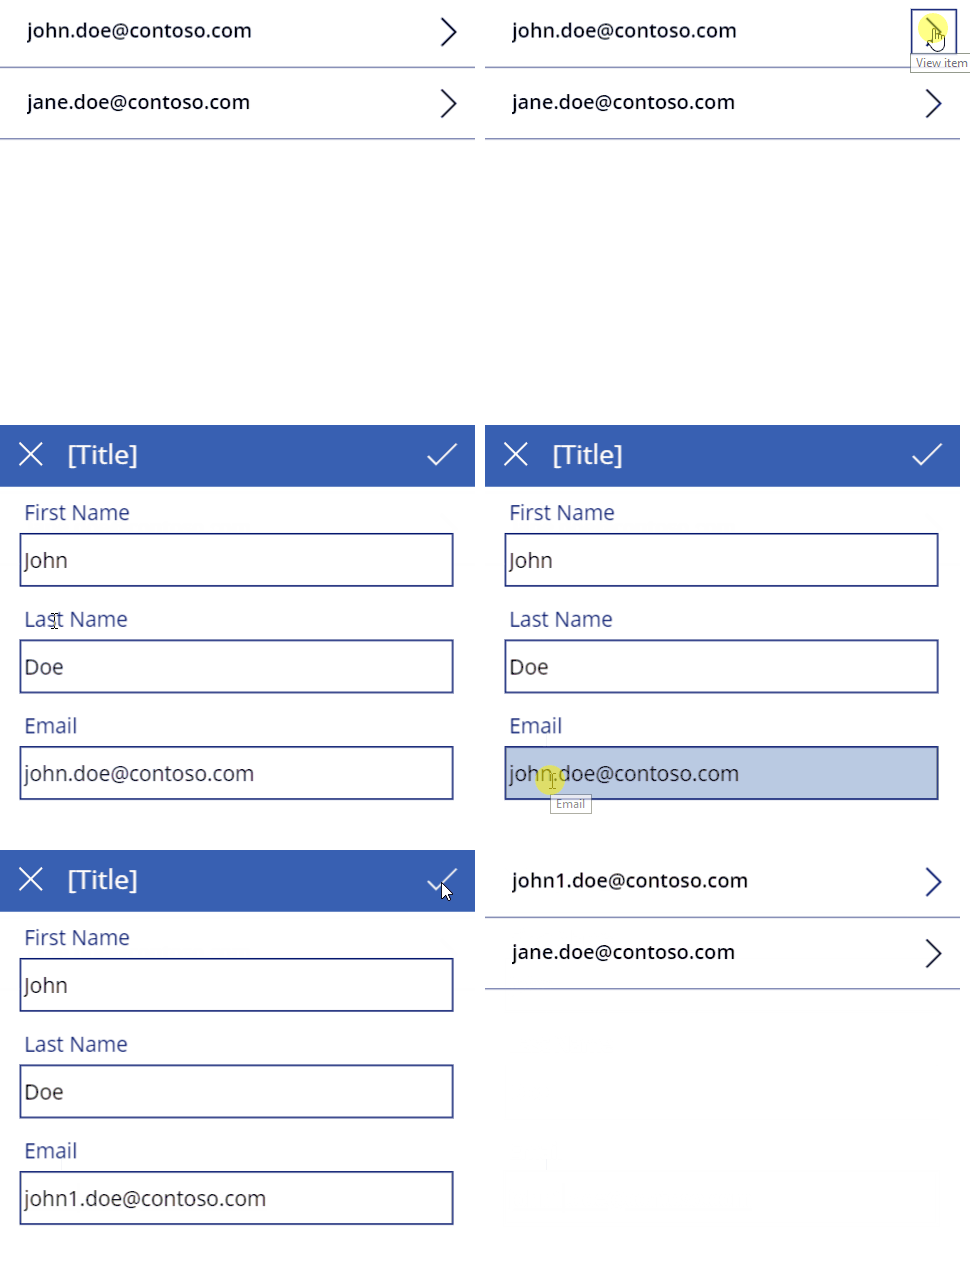
Now you can test your app by opening the app and selecting one of the contacts and then changing the email on the edit form. If everything is set up well you should see a changed email when you go back to the list form.
Your app is still not saved so you need to save it first by pressing the File -> Save button. When you saved your app you should see the app ID field populated on the Field properties dialog.
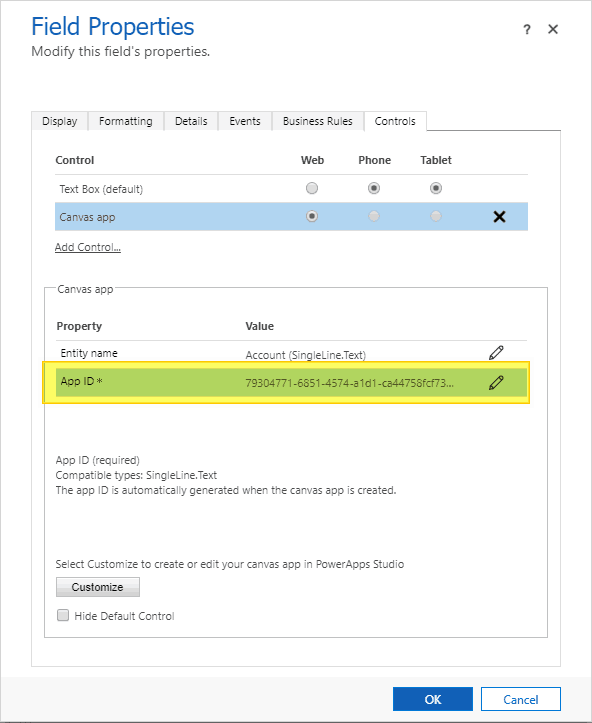
Finally we have our canvas app 100% complete. Now we need to test it on the Unified Interface because it's not working on classic Web view.
Final result on the account form should look like this:

Video showing the full flow is shown below:
Conclusion
This is the trick how to add life to the context of the canvas app on the entity form. I hope that in future this will be OOB functionality, but we know that in the early days we still need to do hacks to implement something.
Probbably the same thing will be possible on the subgrid control when they fix the context fields bug.
